How to Draw Autocad Floor Plan? Simple Floor Plan Drawing
2 min read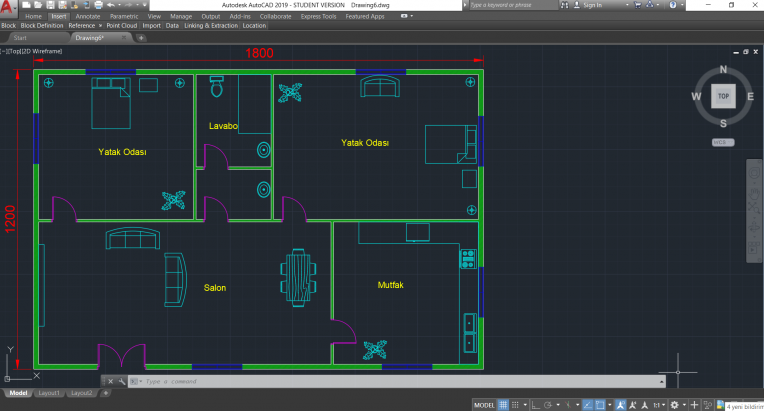
Here is a simple but very helpful study about how to draw Autocad Floor Plan. You may be new to Autocad and you may have just a couple of ideas on floor plans. If you also know the Autocad commands, this study would work for you. Architecturally, of course there are many details. However, this one would be a nice introductory work for you. Now let’s check it step by step.
Drawing Autocad Floor Plan
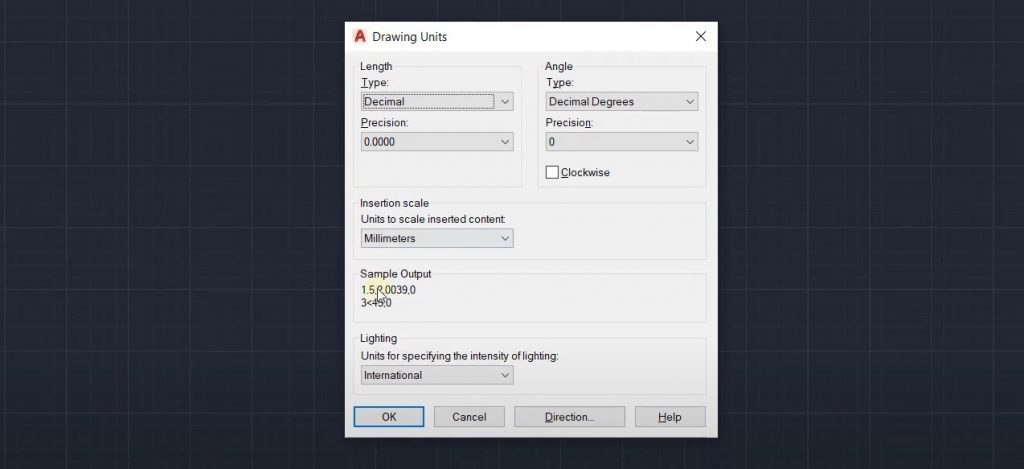
- Make sure about the measurement units: Firstly, when you open Autocad, you should make sure if unit of your work is mm, cm or m. If you want to change the units, then enter Units command on the keyboard. You can choose and confirm the desired unit at the “Units to scale…” section. Now you can continue.
- Start drawing: In accordance with the floor plan, you can complete your drawings using the basic Autocad commands. Now you can draw the floor plan using the most common commands like Line, Rectang, Arc, Offset or Trim. While drawing, you can create new layers. Layers help you to work easier. You can hide or display layers according to the drawing objects that you want to hide or view. Also you can work with more distinguishable colours and line types.
 Another useful tool that would speed up your work is Block. Also it is a must in big projects. You can create new blocks, quickly bring some units like doors or windows and carry them to new dimensions. In case of possible changes in the drawing, block would be very helpful. Also, if you will get into an exam on Autocad sometime, you should definitely know blocks.
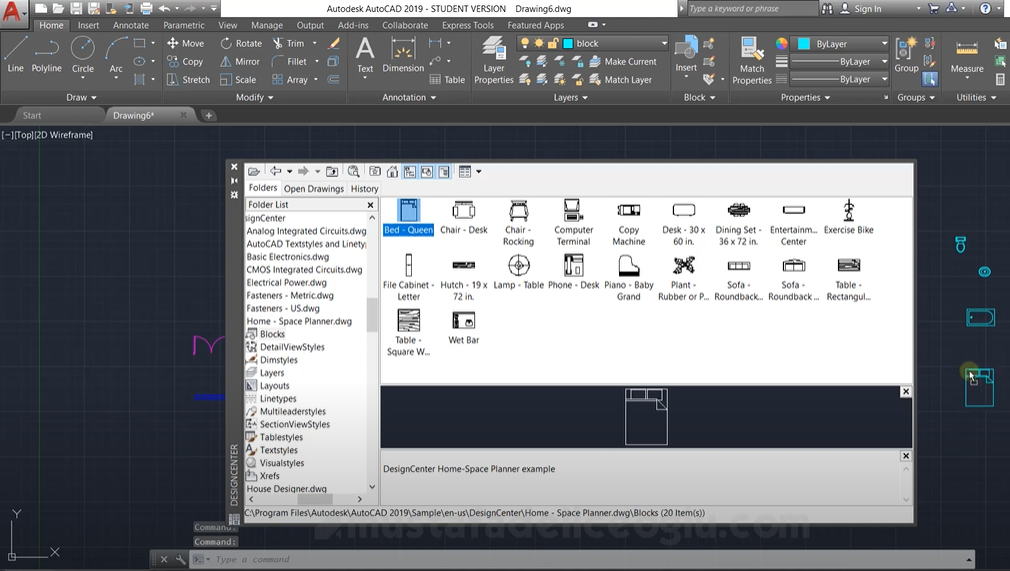
 - Use the Design Center: You don’t need to spend time for drawing some needed objects like bed, table, sink, etc. Because you can pick them from the blocks library. For this, Autocad has a ready design center.To enter this drawing library, press Ctrl+2 on the keyboard. Then enter the en-US folder at the appearing screen. Now you will see the Design Center folder. When you enter this folder, you will see the ready blocks of the objects that you need. You can click and drag the needed drawing to your drawing area. It’s that simple.
- Arrange the rooms: Now you can place the objects in the room. For doing this, some basic commands like move, rotate, copy and mirror would be very helpful.
Now whenever you enter to an examination on drawing Autocad floor plan, you can make a simple drawing completing these steps. I hope it would be helpful.


